
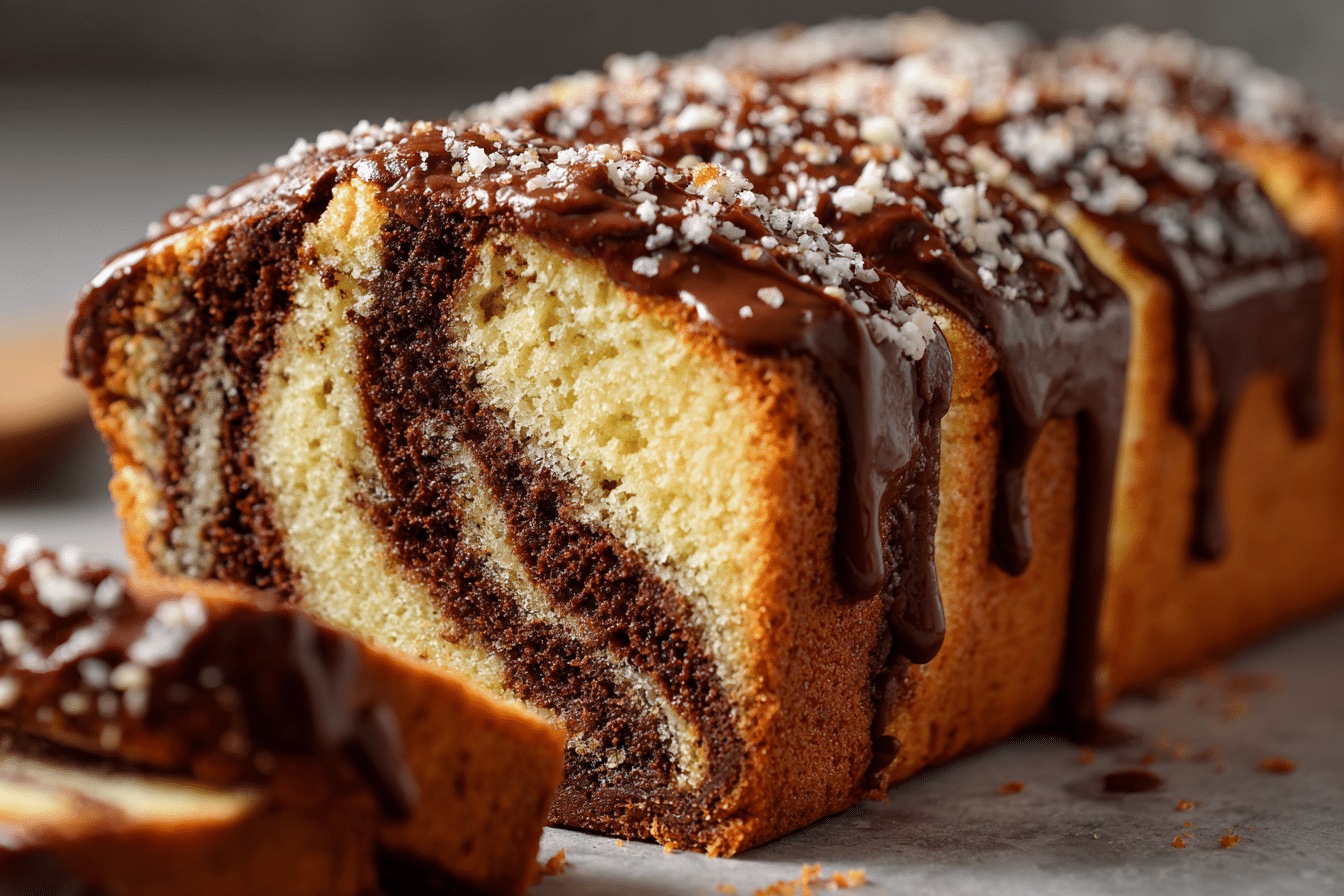
This Vanilla and Chocolate Marble Loaf Cake is the ultimate tea-time treat—soft, tender, and beautifully swirled with chocolate and vanilla flavors in every slice. Baked in a loaf pan for simplicity, this cake has a moist crumb, buttery texture, and a gorgeous marbled pattern that looks impressive but is incredibly easy to achieve.
Whether served plain with coffee or topped with a light glaze or dusting of powdered sugar, it’s a versatile and nostalgic dessert that’s perfect for everyday baking, brunch spreads, or gifting to friends.
If you love both vanilla and chocolate, this cake lets you enjoy the best of both worlds—no need to choose!
Ingredients Overview
This marble loaf cake comes together with basic pantry staples, yet the result feels bakery-worthy. Here’s what each ingredient brings to the table:
All-Purpose Flour
Gives the cake structure and ensures a tender crumb. Avoid overmixing once the flour is added to keep it light and soft.
Granulated Sugar
Adds sweetness and helps lock in moisture. Creaming it with butter creates air for lift.
Unsalted Butter
Adds rich flavor and keeps the crumb soft and buttery. Make sure it’s fully softened for easy creaming.
Eggs
Provide structure, richness, and help emulsify the batter.
Whole Milk (or Buttermilk)
Adds moisture and tenderness. Buttermilk adds a subtle tang and improves the cake’s rise.
Baking Powder
Leavens the cake, making it rise and stay fluffy.
Salt
Balances the sweetness and enhances all the other flavors.
Vanilla Extract
Infuses the batter with warm, sweet flavor—essential for a classic vanilla base.
Cocoa Powder
Used to create the chocolate swirl. Unsweetened cocoa adds deep flavor without making the cake overly sweet.
Hot Water or Coffee
Added to the cocoa powder to form a smooth chocolate batter. Coffee enhances the chocolate flavor without tasting like coffee.
Optional Add-in: A small handful of mini chocolate chips in the chocolate batter adds extra indulgence.
Step-by-Step Instructions
1. Preheat & Prepare Pan
Preheat oven to 350°F (175°C). Grease a standard 9×5-inch loaf pan and line it with parchment paper, leaving an overhang for easy removal.
2. Cream Butter and Sugar
In a large bowl, beat softened butter and granulated sugar for 3–4 minutes until light, fluffy, and pale in color. This incorporates air for a tender cake.
3. Add Eggs and Vanilla
Add eggs one at a time, beating well after each addition. Stir in the vanilla extract.
4. Combine Dry Ingredients
In a separate bowl, whisk together flour, baking powder, and salt.
5. Mix the Batter
Alternate adding the dry ingredients and milk to the butter mixture. Begin and end with the flour mixture. Mix just until combined—do not overmix.
6. Prepare Chocolate Batter
In a small bowl, stir cocoa powder with 2–3 tablespoons of hot water (or coffee) until smooth. Transfer about 1 cup of the vanilla batter into this bowl and mix to create the chocolate batter.
Optional: Fold in a few mini chocolate chips for added richness.
7. Layer the Batter
Spoon dollops of vanilla and chocolate batter alternately into the prepared loaf pan. Once all the batter is in the pan, use a knife or skewer to gently swirl the two batters together in a figure-eight motion. Don’t overdo it—2–3 swirls are enough for a defined marble look.
8. Bake
Bake for 50–60 minutes, or until a toothpick inserted into the center comes out clean or with a few moist crumbs. If the top browns too quickly, tent loosely with foil during the last 15 minutes.
9. Cool
Let the cake cool in the pan for 10–15 minutes, then lift it out using the parchment and place on a wire rack to cool completely.
10. Optional Glaze or Dusting
For extra sweetness, drizzle with a simple vanilla or chocolate glaze. Or keep it classic with a light dusting of powdered sugar.
Tips, Variations & Substitutions
-
Make it dairy-free: Use plant-based butter and almond or oat milk.
-
Add citrus zest: Lemon or orange zest in the vanilla batter adds a bright twist.
-
Use sour cream: For an ultra-moist cake, replace half the milk with sour cream or yogurt.
-
Turn into muffins: Use a muffin tin and bake for 20–25 minutes for marbled cupcakes.
-
Gluten-free: Use a 1:1 gluten-free flour blend—be sure to measure accurately for best results.
Serving Ideas & Occasions
This marble loaf cake is perfect for:
-
Breakfast or brunch: Slice and serve with coffee, cappuccino, or chai.
-
Afternoon snack: A simple treat that’s not too sweet.
-
Bake sales or gifts: Wrap in parchment and twine for a thoughtful homemade gift.
-
Holiday platters: Dress up with glaze and berries for festive presentation.
It tastes wonderful at room temperature or lightly warmed. It also toasts beautifully with a pat of butter the next day.
Nutritional & Health Notes
While rich and buttery, this cake can be enjoyed in moderation as part of a balanced treat rotation:
-
Butter and eggs provide healthy fats and protein.
-
Cocoa contains antioxidants.
-
Portion control is easy—slice into 10–12 servings.
To lighten:
-
Use Greek yogurt in place of some butter.
-
Reduce sugar slightly without affecting texture.
-
Opt for a thinner glaze or powdered sugar dusting instead of frosting.
FAQs
Q1: Can I freeze marble loaf cake?
A1: Yes! Wrap slices or the whole loaf tightly in plastic wrap and foil. Freeze for up to 2 months. Thaw at room temperature or reheat gently.
Q2: Can I use only vanilla or only chocolate batter?
A2: Definitely. Just skip the cocoa swirl for a pure vanilla loaf, or add extra cocoa for a full chocolate version.
Q3: Why is my cake dry?
A3: Overbaking or overmixing can lead to dryness. Start checking doneness at 50 minutes and mix the batter only until ingredients are combined.
Q4: Can I use cake flour?
A4: Yes, cake flour makes the crumb even more tender. Substitute 1 cup plus 2 tbsp cake flour for each cup of all-purpose flour.
Q5: Can I make this into a layered cake?
A5: This recipe is best for loaf-style cakes, but can be baked in two 6-inch round pans for a mini layer cake. Reduce baking time to 25–30 minutes.
Q6: How do I keep the swirl defined?
A6: Spoon the batters in layers and swirl gently with a knife. Too much swirling will blend the colors and reduce the marble effect.
Q7: Can I add chocolate chips or nuts?
A7: Yes! Fold ½ cup mini chocolate chips or chopped nuts into either batter for added texture and flavor.
PrintChocolate Marble Loaf Cake – Simple Baking Recipe Idea
A moist, tender marble loaf cake swirled with rich cocoa and sweet vanilla—perfect for breakfast, snacks, or tea time. Easy to make and full of flavor in every bite.
- Prep Time: 15 minutes
- Cook Time: 55 minutes
- Total Time: 1 hour 10 minutes
- Yield: 10–12 slices 1x
Ingredients
-
1¾ cups all-purpose flour
-
1½ tsp baking powder
-
¼ tsp baking soda
-
½ tsp salt
-
½ cup unsalted butter, softened
-
¾ cup granulated sugar
-
2 large eggs
-
1 tsp vanilla extract
-
¾ cup whole milk (or buttermilk)
-
3 tbsp unsweetened cocoa powder
-
2–3 tbsp hot water or coffee
-
Optional: ¼ cup mini chocolate chips
Instructions
-
Preheat oven to 350°F (175°C). Grease and line a 9×5-inch loaf pan.
-
In a bowl, whisk flour, baking powder, baking soda, and salt.
-
Cream butter and sugar until light and fluffy. Add eggs and vanilla, beat well.
-
Alternate adding dry ingredients and milk to the batter. Mix until just combined.
-
In a separate bowl, mix cocoa with hot water. Combine with 1 cup of batter to make chocolate swirl.
-
Spoon vanilla and chocolate batters alternately into the pan. Swirl gently with a knife.
-
Bake 50–60 minutes, or until a toothpick comes out clean.
-
Cool in pan 15 minutes, then remove to cool completely.
-
Dust with powdered sugar or glaze before serving.
Notes
-
Don’t overmix once flour is added.
-
Freeze leftovers for up to 2 months.
-
For a richer chocolate flavor, use Dutch-process cocoa.