
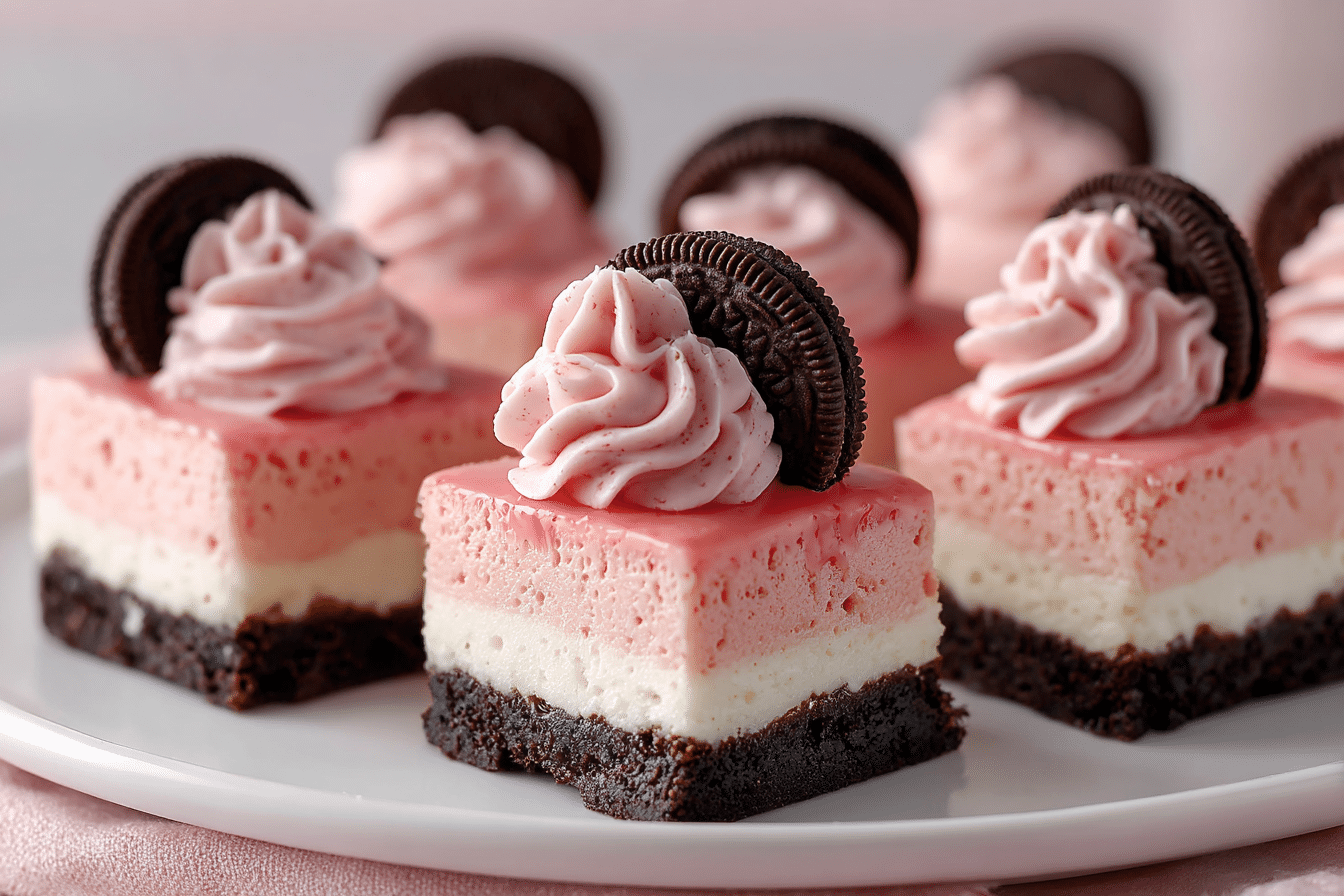
There’s something undeniably charming about the vibrant contrast of pink cheesecake and dark Oreo crust. These Pink Oreo Cheesecake Squares blend the playful color of strawberry-flavored cream with the rich crunch of chocolate sandwich cookies, making them a favorite for birthday parties, Valentine’s Day, baby showers, or just a fun weekend treat.
Unlike traditional baked cheesecakes, these squares require no oven time. That means quicker prep, no water bath, and a smoother, silkier texture. With a bold pink hue and creamy, tangy filling layered over a buttery Oreo base, every bite delivers a satisfying mix of flavors and textures — cool, luscious, crunchy, and sweet with just a hint of salt.
If you’re looking for a dessert that’s eye-catching yet easy to make, these cheesecake bars are just the thing.
Ingredients Overview
Each component of this recipe plays a distinct role in achieving that signature look and taste of pink Oreo cheesecake squares. Here’s what you’ll need:
Oreo Cookies (Classic or Golden)
-
Purpose: The base of these squares. Chocolate Oreo cookies give contrast to the pink filling, while Golden Oreos offer a lighter, more neutral background.
-
Tips: Use whole cookies, including the cream, for a richer and more cohesive crust. You can opt for a gluten-free Oreo alternative if needed.
Unsalted Butter
-
Purpose: Binds the crushed cookies into a solid, pressable crust.
-
Tips: Melt and slightly cool before mixing with the cookies. Salted butter can be used if you like a sweet-salty balance.
Cream Cheese (Full-Fat)
-
Purpose: The main body of the filling — tangy, rich, and creamy.
-
Tips: Use room temperature cream cheese for smooth blending. Low-fat versions will work but may affect the final texture.
Powdered Sugar
-
Purpose: Sweetens the filling without grittiness.
-
Tips: Sift it first to avoid lumps and ensure even mixing.
Vanilla Extract
-
Purpose: Adds warmth and rounds out the sweetness.
-
Substitutions: Almond or strawberry extract can enhance the pink theme but use sparingly.
Pink Food Coloring
-
Purpose: Gives the cheesecake its cheerful, pastel color.
-
Tips: Gel-based food coloring provides a vibrant hue with just a drop or two.
Whipped Topping or Heavy Cream
-
Purpose: Lightens the cheesecake for a mousse-like texture.
-
Tips: If using heavy cream, whip to stiff peaks before folding into the filling.
Optional: Freeze-Dried Strawberries or Strawberry Extract
-
Purpose: For a natural fruity flavor that complements the pink tone.
-
Tips: Blend freeze-dried strawberries into powder before adding.
Step-by-Step Instructions
These pink Oreo cheesecake squares are easy to assemble — no baking, no cracking, no stress.
1. Prepare the Crust
-
Line an 8×8 or 9×9-inch square baking pan with parchment paper, leaving overhang for easy lifting.
-
In a food processor, pulse about 24 Oreo cookies (classic or Golden) until they form fine crumbs.
-
Pour in 6 tablespoons of melted butter and pulse until the mixture resembles wet sand.
-
Press the mixture firmly into the base of the prepared pan, using the bottom of a glass or measuring cup to smooth it evenly.
-
Chill in the fridge for at least 20–30 minutes while preparing the filling.
2. Make the Cheesecake Filling
-
In a large bowl, beat 16 oz of softened cream cheese with a hand mixer until smooth and creamy — no lumps.
-
Add 3/4 cup of powdered sugar and 1 teaspoon of vanilla extract. Mix until combined.
-
For color, add a few drops of pink gel food coloring and beat until the color is evenly distributed.
-
Gently fold in 2 cups of whipped topping or whipped cream until fully incorporated. Use a spatula and avoid overmixing.
-
Optional: Add 2 tablespoons of powdered freeze-dried strawberries or 1/4 teaspoon of strawberry extract for flavor depth.
3. Assemble and Chill
-
Spread the pink cheesecake mixture evenly over the chilled Oreo crust. Smooth the top with an offset spatula or the back of a spoon.
-
Refrigerate for at least 4 hours, or overnight for best texture and flavor.
4. Slice and Serve
-
Once fully set, lift the cheesecake out of the pan using the parchment overhang.
-
Cut into 16 squares using a sharp knife, wiping the blade clean between slices for neat edges.
-
Garnish with mini Oreos, strawberry slices, sprinkles, or white chocolate drizzle if desired.
Tips, Variations & Substitutions
-
Whipping Cream Option: If you prefer homemade whipped cream over store-bought topping, beat 1 cup of heavy cream with 2 tablespoons of powdered sugar until stiff peaks form.
-
Vegan/Dairy-Free: Use vegan cream cheese and coconut whipped topping. Pair with dairy-free sandwich cookies.
-
Natural Coloring: Beet powder or strawberry powder can add a subtle pink hue without synthetic dyes.
-
Crust Twist: Try a half-and-half base with both chocolate and Golden Oreos for a marbled cookie crust.
Common Mistakes to Avoid:
-
Overmixing the whipped topping can cause the filling to deflate.
-
Skipping chill time will result in messy, soft squares.
-
Using warm butter in the crust may make it greasy and soggy.
Serving Ideas & Occasions
These cheesecake squares are perfect for:
-
Valentine’s Day: Add heart-shaped sprinkles or pink edible glitter.
-
Baby Showers or Gender Reveals: Go heavy on the pastel hues and top with themed decorations.
-
Brunch Desserts: Serve with a berry compote or mimosa.
-
Summer Gatherings: Keep chilled and serve cold for a refreshing bite.
Pair them with light beverages like iced tea, rosé, or lemonade to balance the rich, creamy texture.
Nutritional & Health Notes
While these squares are undeniably indulgent, portion control makes them a suitable treat even for those watching their intake. Each piece offers:
-
A balance of carbohydrates and fat, with a modest amount of protein from the cream cheese.
-
To make them lower in sugar, reduce the powdered sugar to 1/2 cup and skip additional toppings.
-
For a gluten-free version, use certified gluten-free sandwich cookies and check labels on the whipped topping.
These bars are rich, so a small square goes a long way in satisfying cravings without overdoing it.
FAQs
Q1: Can I freeze pink Oreo cheesecake squares?
A1: Yes, you can freeze them. Once fully set in the fridge, cut into squares and wrap each one individually in plastic wrap. Store in an airtight container for up to 1 month. Thaw in the refrigerator before serving for best texture.
Q2: Can I use food coloring alternatives?
A2: Natural alternatives like beet powder, pomegranate juice concentrate, or freeze-dried strawberry powder can provide a pink tint without synthetic dyes. Keep in mind that natural colorings may be more muted.
Q3: What kind of Oreos work best for this recipe?
A3: Classic chocolate Oreos give the best contrast with the pink filling, but Golden Oreos offer a more neutral flavor. Flavored options like strawberry or raspberry Oreos can add an extra layer of taste.
Q4: Is it okay to make this recipe ahead?
A4: Absolutely. These cheesecake squares are actually better when made a day in advance. This allows the filling to firm up and the flavors to meld perfectly.
Q5: Can I double this recipe for a larger crowd?
A5: Yes, simply double all ingredients and use a 9×13-inch pan. Be sure to chill the cheesecake for at least 6 hours to ensure it sets properly when scaled up.
Q6: How can I make them more festive?
A6: Add seasonal sprinkles, colored white chocolate drizzle, or top with a piped rosette of whipped cream. Mini heart candies or edible pearls are also great additions for special occasions.
Q7: Can I make this recipe keto or low-carb?
A7: Yes, use almond flour and butter for the crust, a keto sweetener like erythritol or monk fruit in the filling, and low-carb sandwich cookies or omit the crust entirely. Use whipped heavy cream instead of whipped topping.
PrintPink Oreo Cheesecake Squares That Look Bakery-Perfect
Description: Creamy, no-bake cheesecake squares with a pink filling and Oreo crust — perfect for parties, holidays, or an easy dessert.
- Prep Time: 20 minutes
- Cook Time: 0 minutes
- Total Time: 4 hours 20 minutes (including chill time)
- Yield: 16 squares 1x
Ingredients
-
24 Oreo cookies (classic or Golden)
-
6 tbsp unsalted butter, melted
-
16 oz cream cheese, softened
-
3/4 cup powdered sugar
-
1 tsp vanilla extract
-
Pink food coloring (gel recommended)
-
2 cups whipped topping or homemade whipped cream
-
Optional: 2 tbsp powdered freeze-dried strawberries or 1/4 tsp strawberry extract
Instructions
-
Line an 8×8-inch pan with parchment. Crush Oreos in a food processor.
-
Mix crushed cookies with melted butter. Press into pan and chill.
-
Beat cream cheese until smooth. Add powdered sugar, vanilla, and food coloring.
-
Fold in whipped topping gently.
-
Spread filling over crust. Chill 4 hours or overnight.
-
Lift from pan, slice into squares, and garnish as desired.
Notes
-
Use natural pink coloring if preferred.
-
Store chilled up to 4 days.
-
Freeze up to 1 month, wrapped individually.