
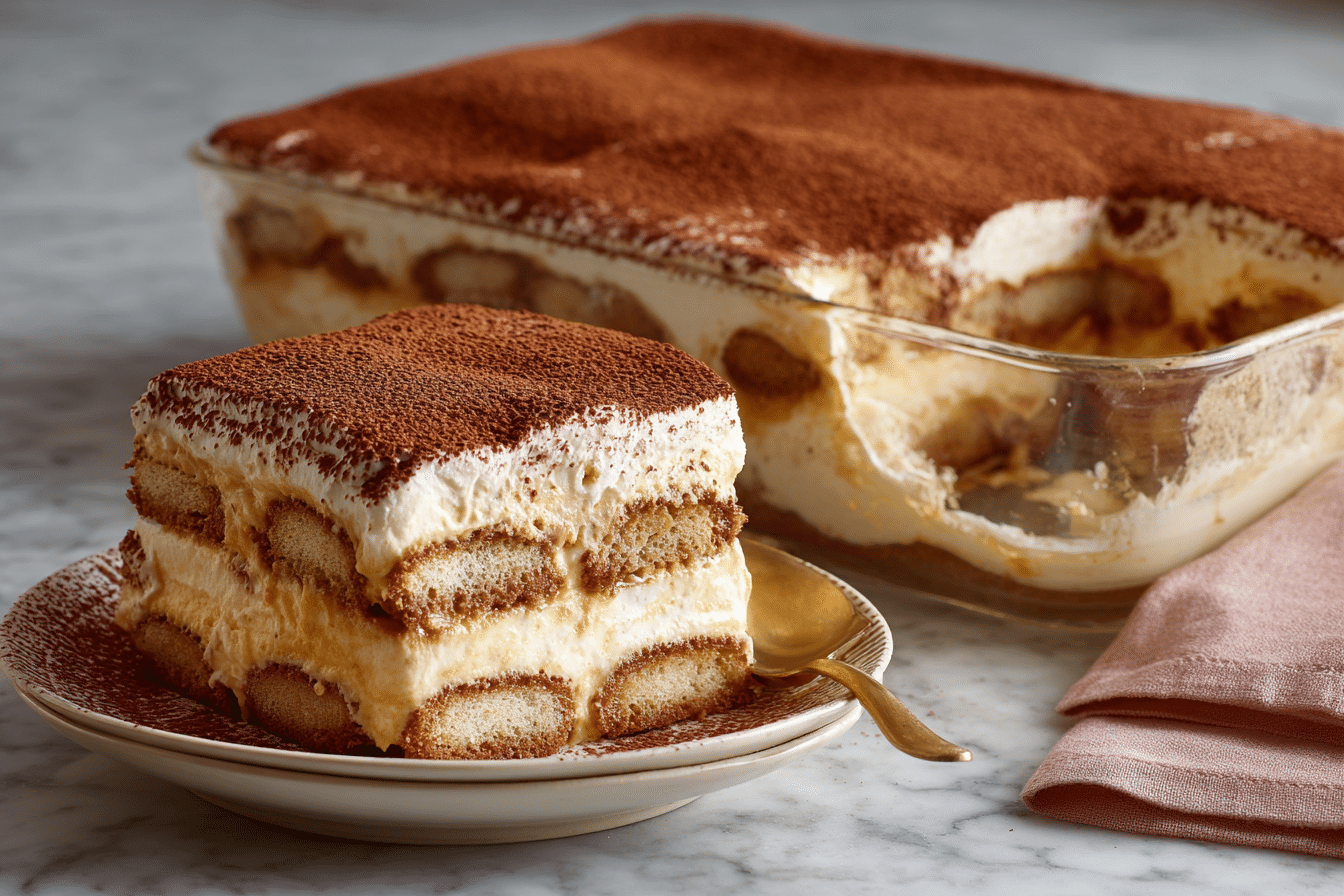
Few desserts capture romance, elegance, and comfort as effortlessly as tiramisu. With its soft, coffee-soaked ladyfingers, velvety mascarpone cream, and dreamy dusting of cocoa powder, tiramisu is the epitome of understated luxury. This tiramisu aesthetic recipe highlights not only its classic flavor but also its visual charm—layers that slice cleanly, a silky finish, and an effortlessly chic presentation.
Tiramisu is more than a dessert; it’s an experience. Its name literally means “pick me up” in Italian, and that’s exactly what it does with each creamy, coffee-kissed bite. The texture is light but indulgent, with a gentle bitterness from the espresso balanced by the smooth sweetness of the mascarpone filling.
Ideal for dinner parties, romantic nights in, or even stylish celebrations, this tiramisu is as photogenic as it is delicious.
Ingredients Overview
This tiramisu recipe uses classic Italian ingredients to ensure both taste and authenticity, with options for making it your own.
For the Coffee Soak:
-
Espresso or Strong Coffee (1½ cups): Freshly brewed and cooled. Adds depth and boldness. Use espresso for true Italian flavor.
-
Coffee Liqueur (optional, 2 tbsp): Enhances the aroma and adds a subtle kick. Kahlúa or amaretto are excellent options.
-
Sugar (1 tbsp): Balances the bitterness of the coffee.
For the Mascarpone Cream:
-
Mascarpone Cheese (500g): The creamy, rich base. Use fresh, high-quality mascarpone for the best texture.
-
Egg Yolks (4 large): Create a silky, custard-like base.
-
Granulated Sugar (100g): Sweetens the yolk mixture.
-
Heavy Cream (250ml): Whipped and folded in for lightness.
-
Vanilla Extract (1 tsp): Adds warmth and aroma.
For Assembly:
-
Savoiardi (Ladyfinger Biscuits, about 24): Crisp sponge biscuits that soften beautifully in coffee.
-
Unsweetened Cocoa Powder (for dusting): Provides a bitter contrast to the sweet cream.
-
Dark Chocolate Shavings or Curls (optional): Adds elegance and texture to the top layer.
Every ingredient contributes to the layered magic of tiramisu, creating a dessert that’s light yet rich, with just the right hint of coffee and cocoa.
Step-by-Step Instructions
-
Brew the coffee soak:
Prepare 1½ cups of espresso or strong coffee. Stir in 1 tbsp sugar and let it dissolve. If using, add 2 tbsp coffee liqueur. Set aside to cool completely. -
Prepare the mascarpone cream:
In a heatproof bowl, whisk together 4 egg yolks and 100g sugar. Place the bowl over a pot of simmering water (double boiler style) and whisk constantly for 5–6 minutes until the mixture thickens slightly and reaches 70°C (160°F). This gently cooks the eggs.
Remove from heat and let cool to room temperature. Gently fold in 500g mascarpone until smooth and creamy.
In a separate bowl, whip 250ml heavy cream with 1 tsp vanilla extract until medium-stiff peaks form. Gently fold the whipped cream into the mascarpone mixture in two batches, being careful not to deflate it.
-
Assemble the tiramisu:
Lightly dip each ladyfinger into the coffee mixture for about 1–2 seconds per side—just enough to absorb without becoming soggy.
Arrange a single layer of soaked ladyfingers at the bottom of a rectangular dish (approximately 9×13 inches).
Spread half of the mascarpone cream over the ladyfingers. Smooth the surface with a spatula.
Repeat with another layer of soaked ladyfingers, then the remaining mascarpone cream. Smooth the top beautifully—this is where the aesthetic presentation begins.
-
Chill:
Cover the dish with plastic wrap and refrigerate for at least 6 hours, preferably overnight. This allows the layers to meld and the dessert to set fully. -
Finish with aesthetic flair:
Right before serving, dust the top generously with unsweetened cocoa powder using a fine mesh sieve. Add dark chocolate curls or shavings in an even, elegant layer. Optionally, garnish with edible flowers or a few espresso beans for contrast.
Tips, Variations & Substitutions
-
Use cold ingredients: For easier folding and better texture, make sure your cream and mascarpone are cold.
-
Don’t over-soak the ladyfingers: A quick dip keeps the structure intact. Oversoaking leads to soggy layers.
-
For a non-alcoholic version: Simply skip the liqueur or replace it with a splash of vanilla or almond extract.
-
Egg-free version: Skip the yolks and use sweetened condensed milk or whipped cream folded into the mascarpone instead.
-
Make it in glasses: For an individual aesthetic presentation, layer into coupe glasses or dessert jars.
-
Vegan option: Use plant-based cream, dairy-free cream cheese, and egg substitutes for a modified but delicious take.
Serving Ideas & Occasions
Tiramisu is a dessert that shines at both casual and elegant gatherings. Serve it chilled, straight from the fridge, for the most refreshing experience.
Ideal occasions include:
-
Romantic dinners or anniversaries
-
Holidays and family celebrations
-
Bridal or baby showers
-
Elegant brunch spreads
-
Instagram-worthy dessert tables
Pair it with a glass of dessert wine, espresso, or a sweet liqueur. Serve on vintage plates or minimalist ceramics for an aesthetic visual contrast.
Nutritional & Health Notes
Tiramisu is a luxurious dessert, so portion size is key. It’s rich in dairy and uses sugar and egg yolks, making it an indulgent treat—but a worthwhile one.
For a lighter option:
-
Reduce the sugar in the egg mixture
-
Use low-fat mascarpone (though texture will change)
-
Make individual portions to control serving size
A standard square (1/12 of a full pan) contains roughly 300–350 calories, depending on ingredient brands and toppings.
FAQs
1. Can I make tiramisu ahead of time?
Yes—tiramisu is actually better when made ahead. Chill for at least 6 hours or up to 2 days before serving for best texture and flavor.
2. Is tiramisu safe with raw eggs?
This version cooks the yolks gently over a double boiler to make them safe. Alternatively, use pasteurized eggs or an egg-free version.
3. Can I freeze tiramisu?
Yes, it can be frozen for up to 1 month. Thaw overnight in the fridge before serving. Note: freezing may slightly change the texture.
4. What kind of coffee is best?
Freshly brewed espresso or strong black coffee works best. Instant espresso powder dissolved in hot water is also a solid option.
5. Why is my mascarpone mixture grainy?
This can happen if the mascarpone is overmixed or not at the same temperature as the egg base. Gently fold all ingredients at similar temperatures.
6. Can I use store-bought whipped topping?
Yes, but freshly whipped cream provides a more natural flavor and lighter texture.
7. How do I slice tiramisu cleanly?
Use a sharp knife dipped in hot water and wiped clean between slices for picture-perfect layers.
Classic Tiramisu Aesthetic with Cocoa-Dusted Layers
Aesthetic and elegant, this classic tiramisu features espresso-soaked ladyfingers, creamy mascarpone filling, and a dusting of cocoa—perfect for romantic dinners or refined gatherings.
- Prep Time: 30 minutes
- Cook Time: 5 minutes
- Total Time: : 6 hours 35 minutes (with chilling)
- Yield: 12 servings
Ingredients
Coffee Soak:
1½ cups brewed espresso or strong coffee, cooled
1 tbsp sugar
2 tbsp coffee liqueur (optional)
Mascarpone Cream:
500g mascarpone cheese
4 egg yolks
100g granulated sugar
250ml heavy whipping cream
1 tsp vanilla extract
Assembly:
24 ladyfinger biscuits (savoiardi)
Unsweetened cocoa powder, for dusting
Dark chocolate shavings (optional)
Instructions
-
Brew coffee, stir in sugar and liqueur. Cool completely.
-
In a bowl over simmering water, whisk yolks and sugar until thickened. Let cool.
-
Fold in mascarpone until smooth. Whip cream with vanilla and fold into mixture.
-
Dip ladyfingers quickly in coffee and layer in dish.
-
Spread half the cream. Repeat layers. Smooth the top.
-
Cover and chill for 6 hours or overnight.
-
Dust with cocoa and add chocolate shavings before serving.
Notes
Make 1–2 days ahead for best flavor. Serve chilled. Store in fridge up to 4 days.