
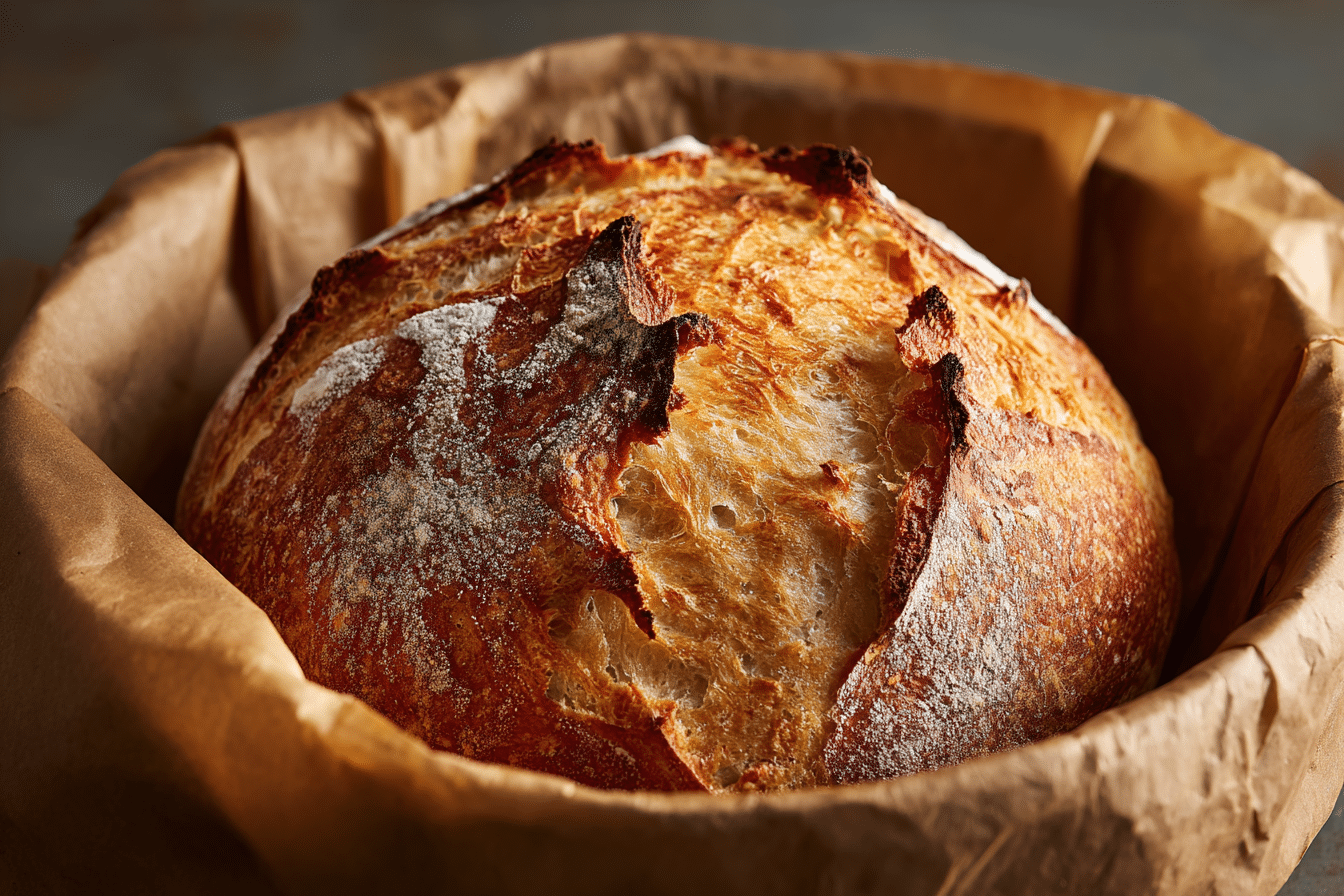
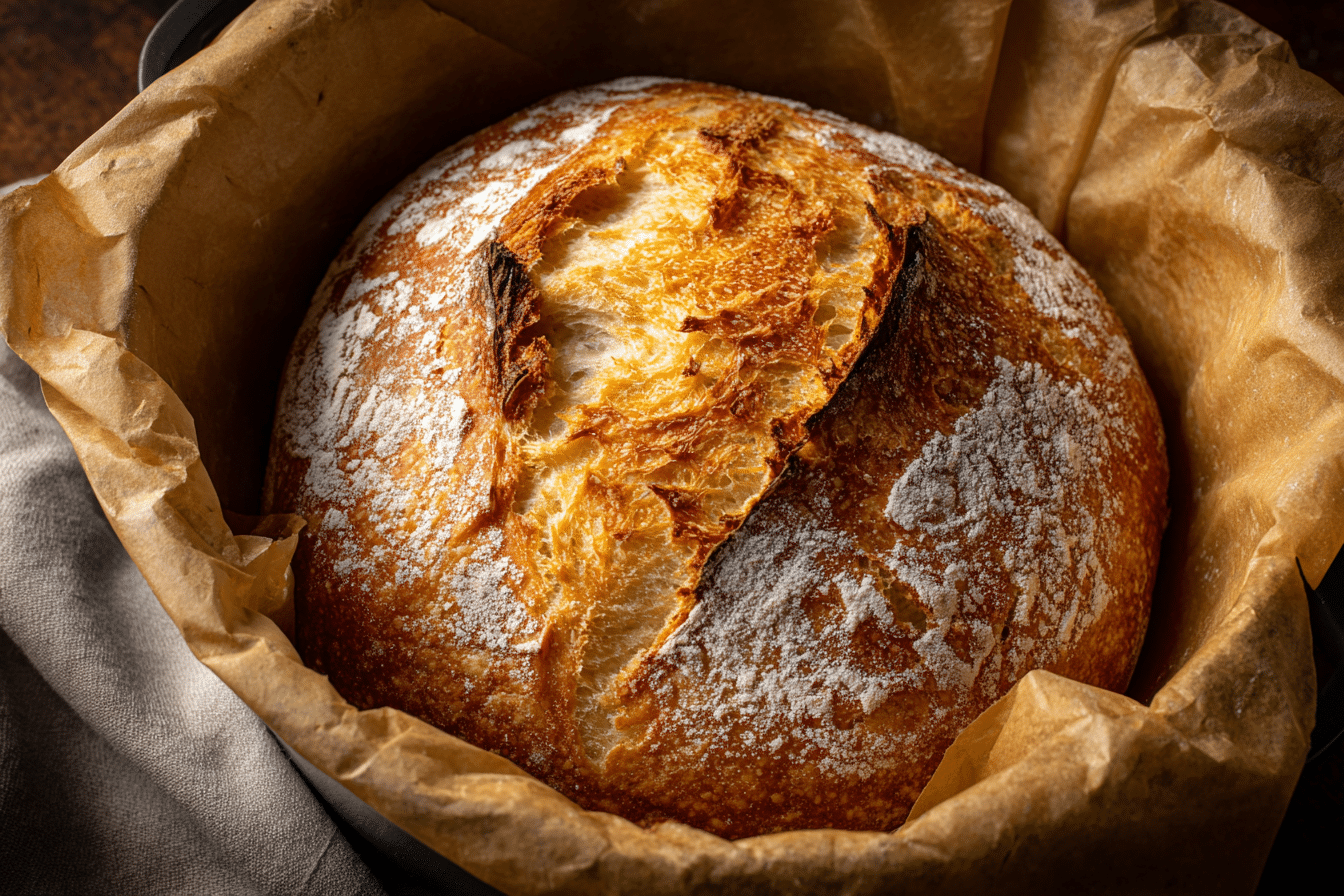
There’s a quiet thrill in pulling a crusty, golden loaf of bread from your oven—especially when it looks like it came from an artisan bakery. With this Quick and Easy Homemade No Knead Artisan Bread, that experience becomes possible for anyone with a mixing bowl and a bit of patience.
This recipe delivers a beautifully rustic loaf with a crackly crust and chewy, tender interior—all without kneading. The secret? Time and high hydration. It’s perfect for beginner bakers or anyone who craves warm, fresh bread with minimal effort.
Whether paired with soup, used for sandwiches, or served with just a dab of butter, this no knead artisan bread is the kind of simple pleasure that never gets old.
Ingredients Overview
All-Purpose Flour
Yes, just basic flour. No fancy blends needed. It gives the bread structure and balances perfectly with the water for an open crumb. Bread flour can also be used for a slightly chewier bite, but all-purpose works beautifully.
Instant Yeast
Even in a no-knead recipe, a small amount of yeast provides lift and flavor. Instant yeast is ideal because it doesn’t require proofing separately. If using active dry yeast, dissolve it in the water first.
Salt
Salt enhances the flavor and strengthens the dough. It also slows the fermentation slightly, improving the overall structure of the bread.
Warm Water
The main hydration source, warm water activates the yeast and allows the flour to fully absorb, creating a soft and sticky dough. Aim for around 100–110°F.
Optional: Cornmeal or flour for dusting the surface before baking.
Step-by-Step Instructions
1. Mix the Dough
In a large mixing bowl, combine 3 cups all-purpose flour, 2 teaspoons salt, and 1/2 teaspoon instant yeast. Stir to distribute. Pour in 1 1/2 cups warm water and mix with a wooden spoon or spatula until a sticky, shaggy dough forms. You don’t need to knead—just mix until no dry flour remains.
2. First Rise (Long Fermentation)
Cover the bowl with plastic wrap or a clean towel and let the dough rest at room temperature for 3 to 4 hours. It should double in size and become bubbly on the surface. If your kitchen is chilly, allow extra time or place the bowl in a slightly warm spot.
3. Shape the Dough
Lightly flour a clean surface and turn the dough out. With floured hands, gently shape it into a round or oval ball. Don’t overwork it—just tuck the sides under to form a tight shape. Let rest for 30 minutes uncovered while the oven preheats.
4. Preheat the Oven and Dutch Oven
Place a Dutch oven (or heavy lidded pot) inside your oven and preheat to 450°F (232°C). This takes about 30 minutes, which gives the dough time to rest and puff slightly.
5. Bake the Bread
Carefully remove the hot Dutch oven. Place the dough onto a piece of parchment paper (for easy transfer) and lower it into the pot. Cover with the lid and bake for 30 minutes. Then, remove the lid and bake for another 10–15 minutes to develop a deep golden crust.
6. Cool Before Slicing
Use tongs to lift the bread out and let it cool on a wire rack for at least 30 minutes before slicing. This ensures the crumb sets properly and keeps the loaf moist.
Common Mistakes to Avoid
-
Rushing the first rise leads to underdeveloped flavor.
-
Using too much flour when shaping can make the loaf dry.
-
Cutting into the loaf while hot releases steam and makes it gummy.
Tips, Variations & Substitutions
Tips
-
Always use a sharp knife or lame if you’d like to score the top before baking.
-
For a crunchier bottom, remove the bread from the Dutch oven during the last 5 minutes and bake directly on the oven rack.
-
To keep your crust extra crisp, crack the oven door open slightly during the last few minutes.
Flavor Variations
-
Add chopped rosemary and garlic to the dough for an herby twist.
-
Mix in olives, shredded cheese, or dried cranberries with nuts.
-
Sprinkle sea salt or sesame seeds on top before baking.
Substitutions
-
Use bread flour instead of all-purpose for a stronger, chewier crumb.
-
For whole grain flavor, swap 1 cup of all-purpose for whole wheat flour.
-
Use active dry yeast, but dissolve it in the water before adding to dry ingredients.
No Dutch Oven?
Use a heavy baking dish with a heat-safe lid or cover with foil. Or place a pan of hot water in the oven for added steam.
Serving Ideas & Occasions
Dinner Side
Serve warm slices alongside pasta, soup, or stew. It’s especially good with butter, olive oil, or a soft cheese spread.
Sandwich Bread
This bread holds up beautifully for grilled cheese, open-faced sandwiches, or tartines.
Breakfast Toast
Toast it and top with jam, butter, or avocado. Add a poached egg for a hearty start.
Gifting or Sharing
Wrap in parchment and twine for a rustic homemade gift. Add a jar of jam or olive oil for a complete basket.
Entertaining
Serve on a cheese or charcuterie board for a rustic, home-baked touch that always impresses.
Nutritional & Health Notes
This artisan bread is made with just four ingredients and no additives or preservatives. It’s naturally vegan, dairy-free, and sugar-free, making it accessible to many diets.
High hydration breads like this tend to be easier to digest for some, and you can increase the nutrition by swapping part of the flour for whole wheat or spelt.
It’s also naturally low in fat. The slow fermentation improves flavor and may reduce gluten intensity slightly compared to quick-rise loaves.
Moderate portion sizes make this a satisfying part of a balanced meal.
FAQs
1. Can I let the dough rise overnight?
Yes. Mix the dough and let it rise in the refrigerator overnight (8–12 hours). This enhances flavor and gives you flexibility. Let it come to room temperature before shaping and baking.
2. What if I don’t have a Dutch oven?
Use any oven-safe pot with a lid, or bake the bread on a baking sheet with a pan of water placed underneath to create steam.
3. Why is my crust too hard?
That’s natural for artisan-style bread. If you prefer a softer crust, store the loaf wrapped in a clean towel or slice and keep in a sealed container.
4. Can I double the recipe?
Yes, but divide the dough into two loaves for even baking. A single large loaf may not bake evenly and could remain underdone inside.
5. How do I store leftovers?
Keep at room temperature in a bread bag or wrapped in foil for up to 2 days. For longer storage, freeze slices in a zip-top bag and toast as needed.
6. Why is my dough too wet or sticky?
That’s normal for high hydration bread. Use floured hands and a scraper to handle it. Don’t add too much flour when shaping—it should stay sticky for that open crumb.
7. Can I make this gluten-free?
Not with a direct flour swap. Gluten-free artisan bread requires different flours and binders. For best results, use a recipe specifically designed for gluten-free baking.
Simple No Knead Bread with a Golden, Crackly Crust
A simple no-knead artisan bread with a crispy crust and chewy interior. Perfect for beginners and made with just 4 pantry ingredients.
- Prep Time: 10 minutes
- Cook Time: 40–45 minutes
- Total Time: 5 hours (includes rise)
- Yield: 1 loaf 1x
Ingredients
3 cups all-purpose flour
1/2 tsp instant yeast
2 tsp salt
1 1/2 cups warm water
Instructions
-
Mix flour, yeast, and salt in a bowl. Add water and stir to form a sticky dough.
-
Cover and let rise at room temp for 3–4 hours until doubled and bubbly.
-
Turn dough onto floured surface. Gently shape into a ball. Rest 30 minutes.
-
Preheat oven to 450°F with a Dutch oven inside.
-
Place dough on parchment and transfer to hot Dutch oven. Cover and bake 30 minutes.
-
Uncover and bake 10–15 more minutes until deep golden.
-
Cool on wire rack at least 30 minutes before slicing.
Notes
Use bread flour for chewier texture. Add herbs or cheese for flavor variation. For overnight rise, refrigerate dough for up to 12 hours.