
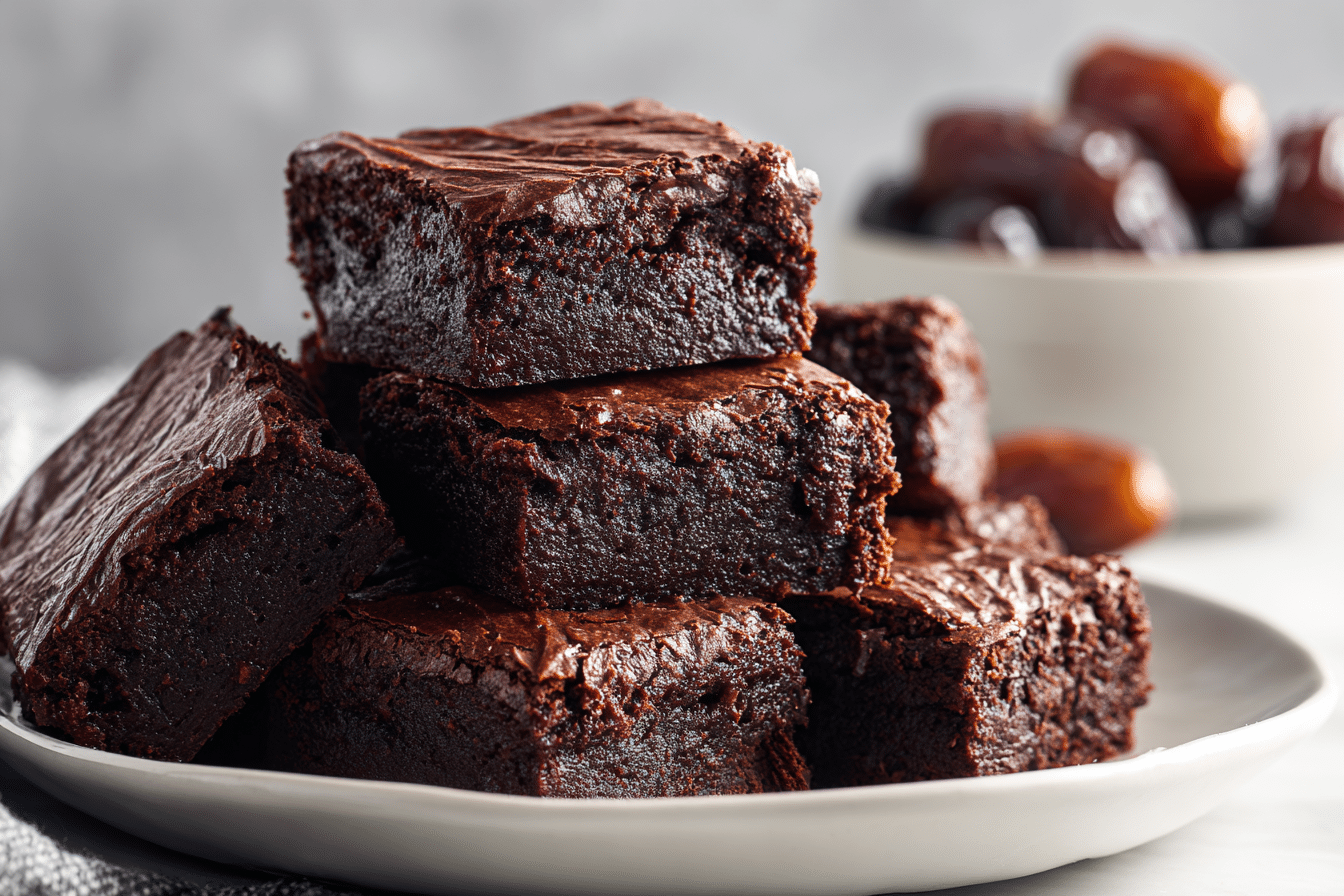
Date brownies offer all the chocolatey satisfaction of traditional brownies — but with a wholesome twist. Naturally sweetened with soft, sticky dates and packed with rich cocoa flavor, these brownies are incredibly moist, dense, and deeply satisfying without relying on refined sugar or flour.
Their texture is soft and slightly chewy, like a perfect cross between a brownie and a truffle. Each bite delivers dark chocolate richness, gentle caramel notes from the dates, and just enough structure to hold together without feeling cakey.
Whether you’re looking for a gluten-free dessert, a refined sugar-free treat, or simply a healthier indulgence, date brownies check all the boxes — and they’re easy to make in one bowl or food processor.
Ingredients Overview
Medjool Dates: The foundation of these brownies, Medjool dates bring sticky sweetness and a caramel-like depth that perfectly balances the cocoa. Make sure they’re soft and pitted. If they feel dry, soak them in warm water for 10 minutes to rehydrate.
Almond Flour or Ground Oats: Almond flour keeps the brownies tender, moist, and gluten-free. Ground oats or oat flour work as a nut-free option with a heartier bite.
Unsweetened Cocoa Powder: Delivers that bold chocolate hit. Use Dutch-processed for a smoother flavor or natural cocoa powder for a slightly more intense, rustic taste.
Eggs: Provide structure and bind the mixture. Use large, room-temperature eggs for the best texture.
Nut Butter (like almond or peanut): Adds fat, richness, and a creamy mouthfeel. Choose smooth nut butter with no added sugar for a cleaner taste. Sunflower seed butter works well for nut-free versions.
Dark Chocolate Chunks or Chips: Melted into the batter or folded in for melty pockets, dark chocolate amplifies the fudgy factor. Choose at least 60% cacao for best results.
Vanilla Extract: Rounds out the flavors and enhances the natural sweetness of the dates.
Salt: Just a pinch balances the sweetness and intensifies the chocolate flavor.
Baking Powder (optional): A small amount can lighten the texture slightly, though many versions skip it for a denser finish.
Step-by-Step Instructions
Step 1: Prepare the Dates
Pit the Medjool dates and soak them in warm water for 10 minutes if they’re not already soft. Drain and pat dry.
Step 2: Preheat Oven and Line Pan
Preheat your oven to 175°C (350°F). Line an 8×8-inch baking pan with parchment paper, leaving some overhang for easy lifting later.
Step 3: Blend Wet Ingredients
In a food processor, combine the dates, eggs, nut butter, and vanilla extract. Blend until completely smooth and creamy. This should take about 1–2 minutes depending on the power of your machine.
Step 4: Add Dry Ingredients
Add cocoa powder, almond flour, salt, and baking powder (if using) to the food processor. Pulse until everything is well combined and forms a thick batter.
Step 5: Fold in Chocolate
Transfer the batter to a mixing bowl and fold in chopped dark chocolate or chocolate chips if desired. This step ensures chocolate chunks throughout for extra richness.
Step 6: Spread and Bake
Scoop the batter into the prepared baking pan and smooth the top with a spatula.
Bake for 20–25 minutes, or until the top is set and a toothpick inserted in the center comes out with moist crumbs. Don’t overbake — you want them fudgy, not dry.
Step 7: Cool and Slice
Let the brownies cool in the pan for at least 20 minutes before lifting them out using the parchment paper. Cool completely on a wire rack before slicing into squares.
Tips, Variations & Substitutions
Soak Dry Dates: If your dates feel tough, always soak them in warm water first to get that creamy texture needed for blending.
Nut-Free Option: Use sunflower seed butter or tahini in place of almond butter, and replace almond flour with oat flour.
Add-Ins: Chopped walnuts, pecans, or shredded coconut add texture and contrast. You can also swirl in peanut butter or top with flaky sea salt.
Egg-Free Version: Try substituting eggs with flax eggs (1 tbsp ground flax + 3 tbsp water per egg) for a vegan-friendly option. The texture will be slightly softer but still delicious.
More Chocolate: For extra decadence, top with more chocolate chips just before baking or drizzle melted chocolate over the cooled brownies.
Boost Flavor: A touch of espresso powder or a pinch of cinnamon can deepen the flavor and make the chocolate shine even more.
Serving Ideas & Occasions
Date brownies are perfect for snacking, packing in lunchboxes, or serving as a healthy dessert at gatherings. They pair beautifully with a glass of almond milk, a hot espresso, or fresh fruit like raspberries or banana slices.
For a dessert upgrade, serve warm with a scoop of vanilla or coconut ice cream and a drizzle of almond butter or melted chocolate.
They also make a thoughtful, homemade gift — wrap slices in parchment and tie with twine for a rustic, feel-good treat.
Nutritional & Health Notes
These brownies are naturally sweetened with dates, which provide fiber, potassium, and a caramel-like richness without needing added sugar.
Almond flour brings healthy fats and protein, making these brownies more satisfying than typical flour-based versions.
They’re gluten-free by nature, and can easily be made dairy-free or vegan depending on the chocolate and egg substitutions used.
While still a dessert, date brownies offer more nutritional balance than traditional recipes — rich enough to feel indulgent, yet nourishing enough for a midday energy boost.
FAQs
Are date brownies healthy?
Compared to traditional brownies, yes. They’re sweetened with whole fruit, made without refined flour, and include healthy fats from nuts. While still a treat, they’re a more balanced option.
Can I make date brownies vegan?
Yes. Use flax eggs in place of regular eggs and ensure your chocolate is dairy-free. The texture may be slightly softer, but the flavor is still rich and satisfying.
Do I need a food processor?
A food processor works best for achieving a smooth texture. A high-powered blender can also work, but it may take more effort to scrape and mix evenly.
How should I store date brownies?
Keep them in an airtight container at room temperature for up to 3 days, or refrigerate for up to a week. They can also be frozen for up to 2 months.
Can I substitute the nut butter?
Absolutely. Use any smooth nut or seed butter you like — almond, peanut, cashew, sunflower seed, or tahini. Just make sure it’s unsweetened for best results.
Why are my brownies dry?
They were likely overbaked or the dates were too dry. Always check them at the 20-minute mark and use soft, moist dates or soak them ahead of time.
Can I double the recipe?
Yes. Use a 9×13-inch pan and bake for 25–30 minutes, checking for doneness in the center. You’ll get more servings with the same delicious results.
Easy Date Brownies for Healthy Sweet Snacks
These naturally sweetened date brownies are rich, fudgy, and made without refined sugar or flour. Packed with cocoa and dark chocolate, they’re a satisfying and wholesome twist on a classic dessert.
- Prep Time: 15 minutes
- Cook Time: 25 minutes
- Total Time: 40 minutes
- Yield: 12 brownies 1x
Ingredients
-
2 cups Medjool dates, pitted and soft
-
1/2 cup almond butter or peanut butter
-
2 large eggs
-
1 tsp vanilla extract
-
1/3 cup unsweetened cocoa powder
-
1/3 cup almond flour or oat flour
-
1/2 tsp baking powder (optional)
-
1/4 tsp salt
-
1/3 cup dark chocolate chunks or chips
Instructions
-
Preheat oven to 175°C (350°F). Line an 8×8-inch pan with parchment paper.
-
If dates are dry, soak in warm water for 10 minutes, then drain.
-
Blend dates, eggs, nut butter, and vanilla in a food processor until smooth.
-
Add cocoa, flour, salt, and baking powder. Pulse until combined.
-
Fold in chocolate chunks.
-
Spread batter evenly in prepared pan.
-
Bake for 20–25 minutes, or until center is set.
-
Cool before slicing into squares.
Notes
Use soft dates for best results. Store in fridge for up to 1 week or freeze for longer storage.