
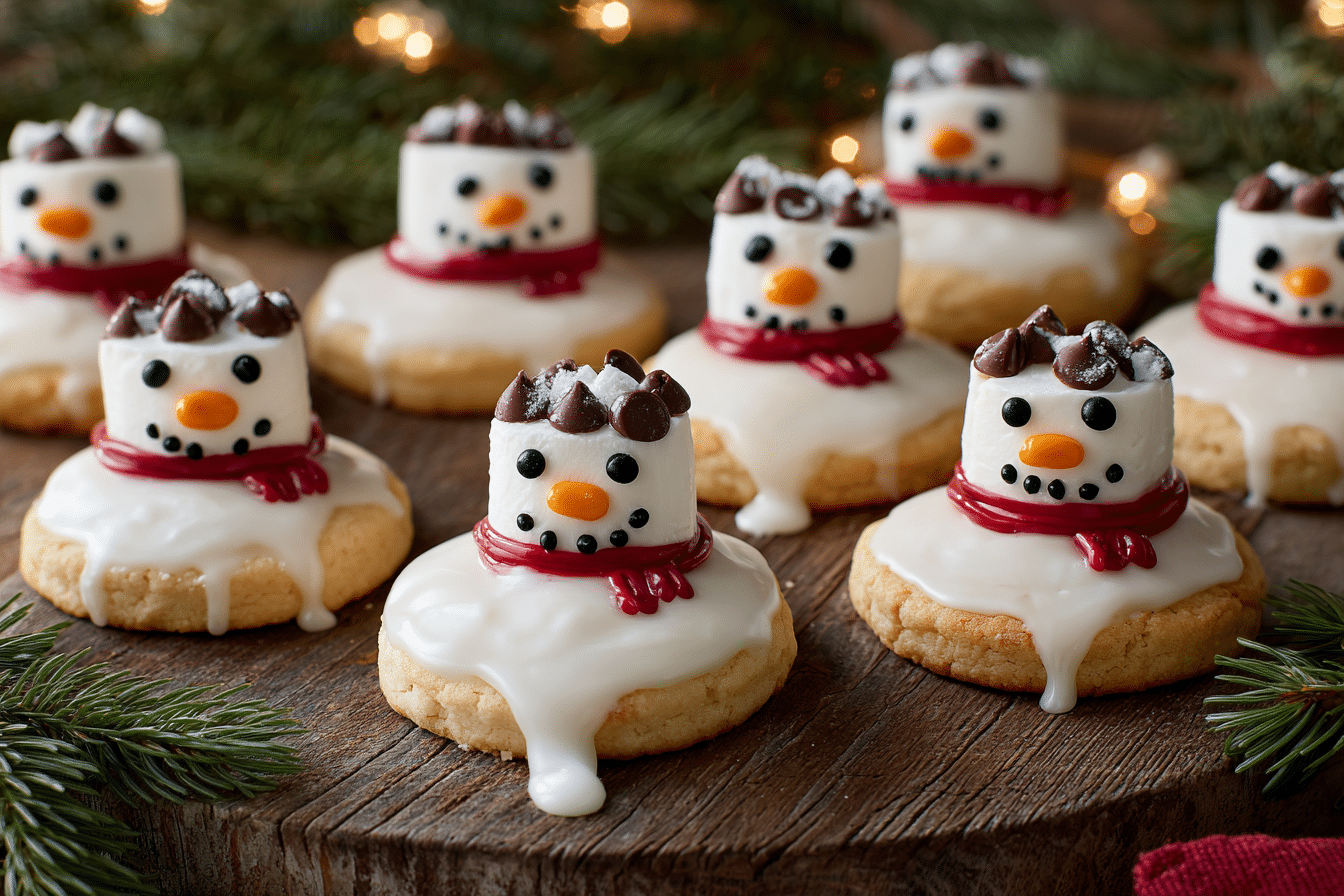
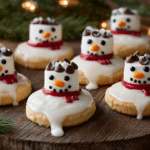
Melting Snowman Cookies are as fun to make as they are to eat. These playful treats turn a simple sugar cookie into a festive, character-filled dessert complete with marshmallow “snowman heads” and drippy icing to mimic melting snow. Perfect for winter baking, classroom parties, or holiday cookie trays, they’re a favorite with kids and adults alike.
Each cookie tells its own story—some with smiling snowmen, others hilariously slumped or surprised as they melt into a sweet vanilla icing puddle. Beyond their cute appearance, the cookies themselves are soft, buttery, and lightly sweetened, making them the perfect base for the creative toppings.
Whether you’re baking with kids or looking for a charming addition to your seasonal lineup, Melting Snowman Cookies are a cheerful way to celebrate the winter season.
Ingredients Overview
Creating these cookies is more about assembling than complex baking. Here’s what you’ll need for both the cookie base and the decorations:
Sugar Cookies
A soft sugar cookie is the ideal base. You can make them from scratch or use a high-quality store-bought or refrigerated dough if short on time. Homemade gives better texture and flavor, and they don’t spread too much.
Marshmallows
Large marshmallows form the snowman “head.” They’re placed on top after baking and help build the whimsical, melting appearance. You can use regular or jumbo-sized for extra drama.
Royal Icing or Glaze
This is the “melting snow.” A simple icing made from powdered sugar, milk, and vanilla (or lemon juice for brightness) creates the white puddle effect. It should be thick enough to hold its shape but loose enough to spread slightly.
Decorative Candies
Mini chocolate chips, candy eyes, orange sprinkles (for noses), and colored icing pens make decorating easy and fun. You can also use pretzel sticks for arms or licorice for scarves.
Food Coloring (optional)
If you’re making faces or accessories, gel food coloring or icing pens are helpful for adding color to buttons, scarves, or hats.
Step-by-Step Instructions
1. Bake the sugar cookies:
Preheat oven to 350°F (177°C). Prepare your favorite sugar cookie dough. Roll into 1½-inch balls and place 2 inches apart on a parchment-lined baking sheet. Bake for 9–11 minutes, until the edges are just golden. Let them cool completely on a wire rack.
2. Prepare the icing glaze:
In a bowl, whisk together 2 cups of powdered sugar with 2–3 tablespoons of milk and ½ teaspoon of vanilla extract. Stir until smooth. The consistency should be pourable but not runny—similar to thick syrup. Add more milk a teaspoon at a time if needed.
3. Create the “melted snow”:
Spoon or drizzle a blob of icing on top of each cooled cookie, letting it pool naturally to mimic melting snow. It should spread but not run off the edges entirely.
4. Add the marshmallow head:
Cut large marshmallows in half crosswise. Place one half, cut-side down, toward the edge of the icing puddle on each cookie. This gives a “slumped over” look as if the snowman is slowly melting.
5. Decorate the face and body:
Use mini chocolate chips or candy eyes for eyes, and an orange sprinkle or small triangle of orange candy for the carrot nose. Draw arms, buttons, or scarves using colored icing pens or melted chocolate.
6. Let icing set:
Allow the decorated cookies to sit at room temperature for at least 1 hour so the icing hardens enough for stacking or storing.
7. Serve or store:
Once dry, the cookies can be served immediately or stored in a single layer in an airtight container at room temperature for up to 5 days.
Tips, Variations & Substitutions
Tips:
-
Let cookies cool completely before decorating or the icing will melt.
-
Use gel food coloring for brighter colors without watering down the icing.
-
Have all decorating pieces prepped before adding the marshmallow—icing sets quickly.
Fun Variations:
-
Make snowmen with personalities: sleepy, surprised, giggling, or “melted mess.”
-
Add tiny candy canes for hats or earmuffs made from mini M&M’s and licorice strings.
-
Flavor the glaze with peppermint or almond extract instead of vanilla for variety.
Substitutions:
-
Use a gluten-free sugar cookie base if needed.
-
For dairy-free, make glaze with almond milk or another non-dairy alternative.
-
Store-bought plain round cookies work in a pinch—just add icing and decorations.
Serving Ideas & Occasions
Melting Snowman Cookies are a hit at school holiday parties, family baking days, and cookie exchanges. They’re especially fun for children’s holiday events—kids love making their own unique snowman faces.
Serve them as part of a winter dessert platter, or package them individually in cellophane bags for party favors or classroom treats. They also make a great hands-on decorating activity at holiday gatherings.
Pair with hot cocoa, peppermint tea, or a warm apple cider for a cozy seasonal dessert moment.
Nutritional & Health Notes
These cookies are a festive indulgence, and while they lean more toward fun than health, they can be made with wholesome homemade cookie bases using real butter and minimal additives.
For a lower-sugar option, reduce the amount of glaze per cookie or use unsweetened natural decorations like dried fruit or chopped nuts.
Each cookie is portion-controlled, making them a reasonable treat for all ages. With a focus on creativity and seasonal joy, they’re more about the moment than the macros.
FAQs
Can I use store-bought cookie dough?
Yes, refrigerated sugar cookie dough works well and saves time. Just be sure the cookies don’t spread too much—chilling the dough helps.
Can I use different icing?
You can use royal icing for a firmer finish or a simple powdered sugar glaze. Avoid canned frosting—it’s too thick to mimic melting snow.
How far ahead can I make these?
You can make and decorate the cookies up to 3 days ahead. Store them in a single layer in an airtight container at room temperature.
Can kids help decorate?
Absolutely! These are perfect for kids’ decorating parties. Set out decorations in small bowls and let them get creative with faces and accessories.
Do the marshmallows stay soft?
Yes, they stay soft for several days. After about 3 days, they may begin to dry slightly but are still edible and delicious.
Can I make these without food coloring?
Yes, just use candy eyes, chocolate chips, or raisins for eyes and buttons. Skipping food coloring doesn’t take away the charm.
Do these cookies travel well?
Yes, as long as the icing has fully set, they travel well in single layers or stacked with parchment between. Great for gift boxes or holiday trays.
Melted Snowman Cookies for Christmas Cookie Boxes
These Melting Snowman Cookies feature soft sugar cookies topped with white icing, marshmallow heads, and fun decorations. Perfect for winter parties and kid-friendly baking.
- Prep Time: 20 minutes
- Cook Time: 10 minutes
- Total Time: 1 hour 30 minutes (with cooling and decorating)
- Yield: 24 cookies 1x
Ingredients
1 batch sugar cookie dough (homemade or store-bought)
12 large marshmallows, halved
2 cups powdered sugar
2–3 tbsp milk
½ tsp vanilla extract
Mini chocolate chips or candy eyes
Orange sprinkles or candy for noses
Icing pens or colored melted chocolate
Instructions
-
Bake sugar cookies at 350°F (177°C) for 9–11 minutes. Cool completely.
-
Mix powdered sugar, milk, and vanilla to form glaze.
-
Spoon glaze onto cooled cookies to create a melting snow shape.
-
Press marshmallow halves into icing for snowman heads.
-
Decorate with eyes, noses, buttons, and arms using candy or icing.
-
Let icing set at room temp for 1 hour before serving or storing.
Notes
Let cookies cool before icing. Use gel food coloring or candy for vibrant decoration.